





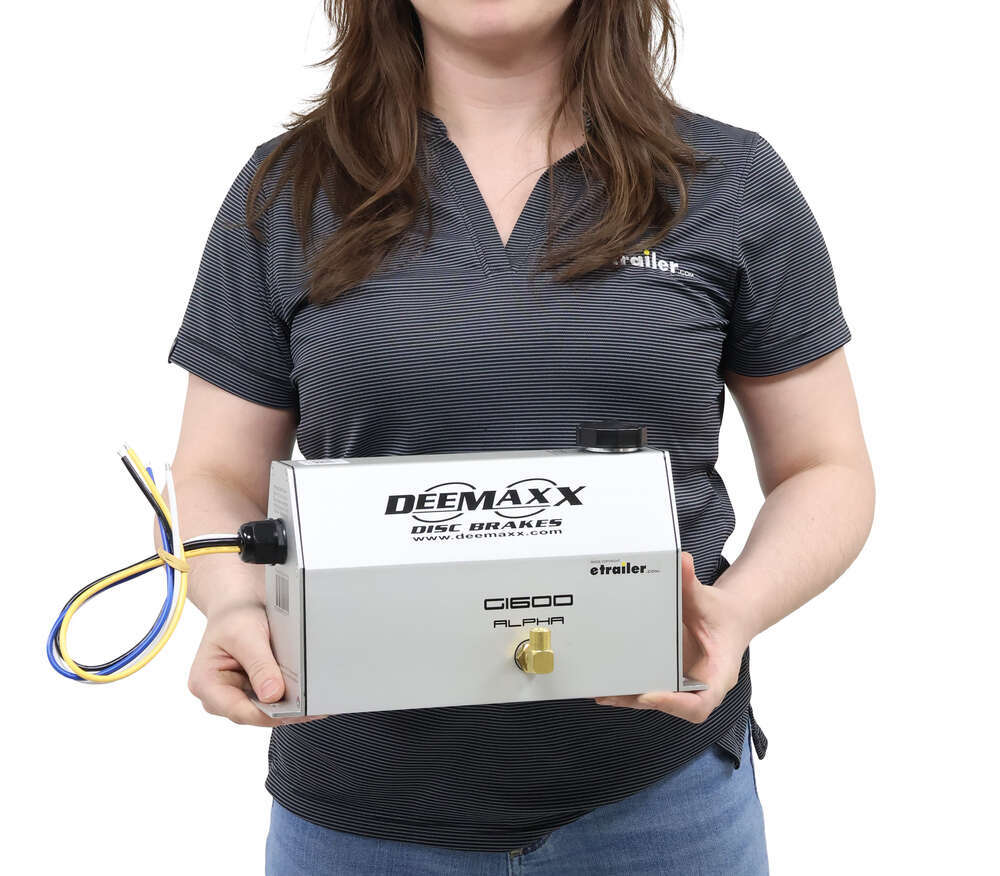


Tandem-axle trailers put a lot of demand on your brakes, especially when you're hauling heavy equipment at highway speeds. This DeeMaxx kit replaces drum brakes with hydraulic disc brakes for more consistent stopping power during long tows.
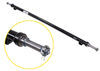
This version of the kit is built around 6,000 lb axles with larger 12" integral hub-and-rotor assemblies. The vented rotor design and built-in drainage help manage heat and shed moisture, while ceramic pads and a stainless steel piston provide smooth, consistent braking. If you are towing heavier equipment or larger trailers, the added rotor mass and axle rating give you more braking confidence.
The Maxx coating on the hub-rotor, caliper, and bracket is rated for over 1,000 hours in salt spray testing. Combined with rotor drainage holes and a 1-piece hub-and-rotor design, this helps reduce rust, contamination, and uneven wear, especially for boat trailers or winter towing.
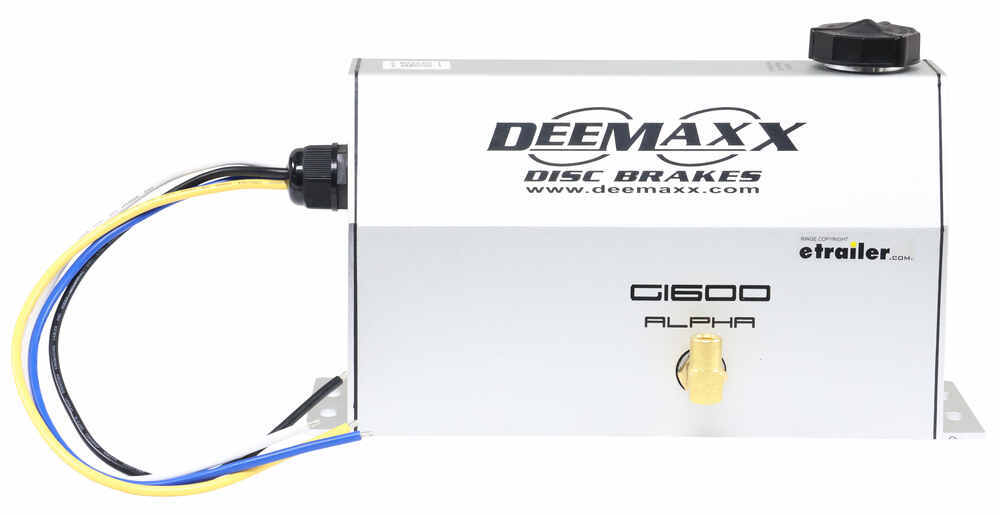
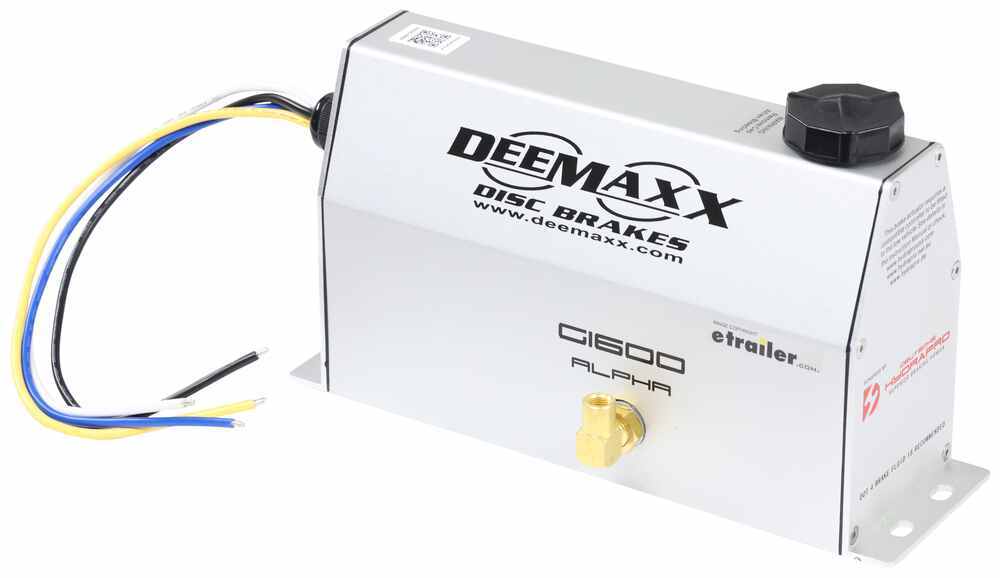
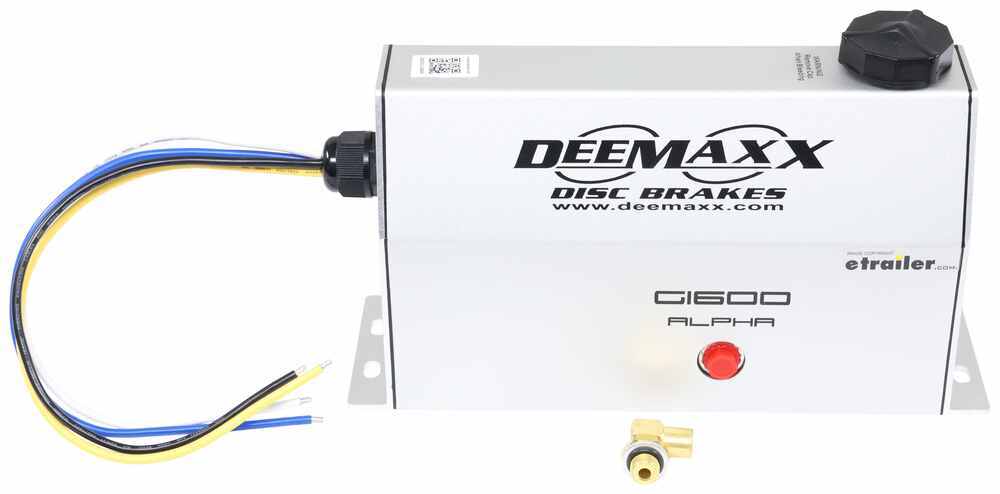
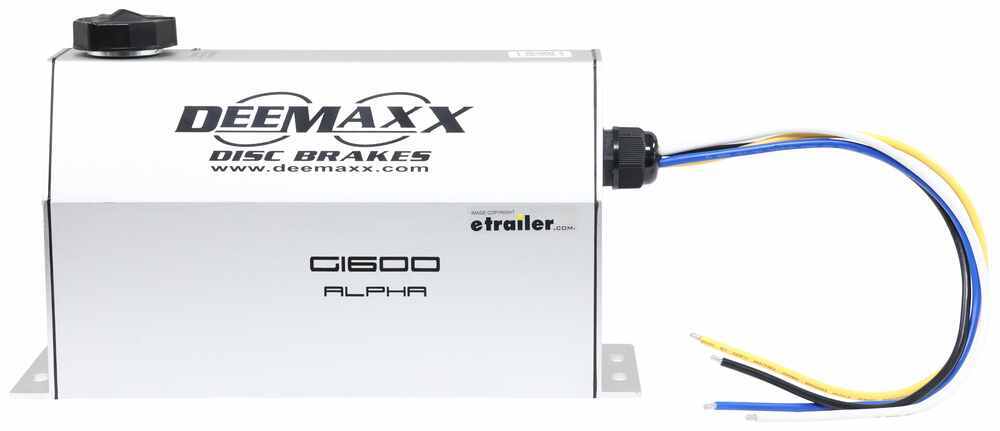
The DeeMaxx Alpha G1600 actuator converts your in-cab brake controller signal into hydraulic pressure up to 1,600 psi. It reaches 1,000 psi in just 3/16 of a second for quick response. The extruded aluminum housing helps manage heat, and the sealed reservoir reduces contamination risk. A 360-degree brake line fitting allows flexible mounting.
The included tandem-axle hydraulic brake line kit features DOT- and SAE-compliant rubber hoses that are easier to route than rigid steel lines. Brass tee and cross fittings, clamps, and mounting hardware are included to secure the system cleanly to your trailer frame.
Disc brakes eliminate many of the springs and internal parts found in drum systems. The 1-piece hub-and-rotor design reduces the risk of trapped moisture causing uneven wear, and laser-etched bleeding instructions on the caliper make future service more straightforward.
Videos are provided as a guide only. Refer to manufacturer installation instructions and specs for complete information.
Hi, everyone. Jesse here with etrailer. Today we'll be taking a look at and I'll show you how to install the DeeMaxx disc brake kit with electric-over-hydraulic actuator on our 2025 Jayco Eagle. (transition whooshing) Your trailer most likely is gonna come with a similar setup to this for the brakes. This is an electric drum break. And this really is just outdated.
The design is over complicated, and there's gonna be a metal drum here that's gonna hold in a lot of heat. So as we can see with our new disc brake, looks modern, you see this on your cars, and they're easy to work on. And also, very good at heat dissipation because of this open design, it's not all covered up, and we even have vents in our rotor here and also in the middle. Another plus to having disc brakes is you don't have to take your wheel off to kind of check on the status of your brakes. I can check my pad life right here.
Obviously, these are new, so we have plenty of pad left. And also, if you crawl up under and look on the inside, you can see the inner pad. Whereas with drum brakes, you're gonna have to take your wheel off, you're gonna have to take your bearing off just to check on the amount of shoe that you have left on your brakes. And that's a lot of work. And since you're already taking it off, most of the time, you're just gonna be adding new stuff anyways without checking it all out.
This kit comes with everything you need to get your brakes installed and get them functioning because you can't just throw disc brakes on your axles and expect them to work properly. So it comes with all of the brake lines that you need to run from all four calipers up to our actuator, which is also included. Tell you what, this actuator is, is it's just a pump to push fluid whenever it gets a signal from your towed vehicle's brake controller to get those calipers to squeeze around the rotor. And that's what makes your trailer stop. Really, that's about all there is to it.
Disc brakes are just a drastic upgrade from the old school drum brakes that your trailer came with. And it's gonna help you be comfortable while you're driving down the road, headed towards your campsite, whether it be in stop-and-go traffic or headed down a mountain road. But when it comes to the installation, this is quite a project. You do have to find a way to get your trailer lifted off the ground. As far as installing the calipers and the disc and all that, that's really just like a standard brake job. You're just pulling the drum assembly off and then replacing that with your disc brakes. Then you'll have to run your brake lines and wire up your actuator, which is a part that people get kind of tricked on, just depending on your trailer setup. If you're not looking to do this all yourself, check out our installer locator. You can find someone local to you that'll be happy to get you set up. If you are looking to see how this gets installed, then follow along and I'll walk you through the process. (transition whooshing) To begin our installation, you'll want to get your wheel removed, and then we'll work on removing our factory brakes. So we'll start with our bearing seal cap here. Just use a flathead screwdriver or small pry bar. (metal thudding) Try to hammer that in to the edges. (metal thudding) And once you get that started, you can kind of just work your way around it, get that to come off. (metal clacking) And behind that, we have our locking clip. So there is a lot of grease. Just find a way to get your screwdriver under it and pop that out. And usually, these nuts are just about hand tight and you can take 'em off. But if yours is a little tight, once again, I'll use that flathead screwdriver to get that broken loose. And unthread that nut. Behind that, we have a washer, which sometimes you can't get it removed, but just get that slit out where we'll just take our whole assembly off and pick that out of there when we're done, just what I'll do. So we'll just take this, wiggle it back and forth while pulling out. If it seems to get stuck, give it a couple taps with your hammer. (metal thudding) Kind of break that loose. Catch that bearing. So there's that washer I was talking about. We are gonna be reusing that nut, the locking clip, and the washer. So make sure you keep those handy and we'll get this pulled the rest of the way off. Now we have five nuts to remove. They're gonna be 9/16. Just put a socket on those. (drill whirring) (drill whirring) (drill whirring) (drill whirring) (drill whirring) (drill whirring) If you run into this issue that I'm having where the stud is spinning on you, it shouldn't happen, but sometimes it does, take a pair of vice grips. And on the backside of that stud, get those vice grips locked on. That'll hold it in place so you can get that nut removed. (drill whirring) Now we can pull our drum assembly off. And you won't be able to pull it all the way out because it'll be connected by some wires and we're just gonna snip those. We aren't gonna be using these studs anymore. We have replacement hardware, so we'll just tap those out. (metal thudding) We will clean all this old grease off of our spindle, just using some Brakleen and a few shop rags. Get that looking nice and new. I'll take my grease gun and just make sure that we only have new grease in there. So push it through, you'll see the grease coming out and change colors to that red, and we'll just clean that off. With our brackets that came in our kit, these are actually designed for a different style axle where it needs an opening down here in order to slip over it. With our setup, the bracket holes only line up if we have our caliper sitting almost on the very top, which is something that we don't want just because it's gonna be really difficult to bleed the caliper, get all that fluid out of there. So we have to just add on these brackets here, which are gonna be able to be positioned in the position that we want. So we're in a 6:00 position 'cause we want the caliper to be on the backside of the axle, so we got it lined up like that. Just make sure that you have five holes lining up with the holes on your axle, and we'll get our hardware put in. And we'll take our bolts in our kit, slide those through, slide one through one of the holes, get a nut threaded on. Just do that same thing with the rest of the holes that we have. (metal clacking) (metal clacking) We will get those tightened down with the same 9/16 inch socket, but you'll need a matching wrench to hold the nut. (drill whirring) (drill whirring) (drill whirring) I'm gonna torque everything down. There's no torque specification in the instructions. I just recommend looking up the recommended torque spec for this size bolt. And going by that, I just like to make sure everything's tightened down evenly. (torque wrench beeping) And I'll tort these down in a star pattern. (metal clacking) (torque wrench beeping) Now we need to pack our bearings. So just get a good amount of grease in your hand and work that in there. So we're just gonna work it in from one side. Keep an eye on the opposite side to see that grease start coming through. And then just go around in a circle and get that whole thing filled up with grease. I've dropped our inner bearing into place, and now we need to install our seal. So we'll just get this level. I'll take a wood block and give it a few nice hits with a hammer. (metal thudding) Make sure it's center. And then I like to just run my finger around the edge, make sure that it fuels nice and flat all the way around. If you feel any raised parts, just try to focus on that with your wood block. (metal thudding) Get that hit. We'll take our assembly, get that slid over our spindle. Make sure you get that seal pushed over. The lip can get kind of tricky if it gets hung up a little bit. You just wanna make sure that you're giving even force against it to get that to push on. (metal clacking) Now we can take our outer bearing, get that slid into place, followed it up with the washer and then the nut. Now we'll take our torque wrench. And torque wrench is here, not really to torque our nut down but to make sure everything's seated properly and also not getting damaged at the same time. So what I'll do to make sure everything seats is slowly tighten this down while rotating the rotor in the opposite direction. I'll do that a couple times. So I'll back that nut off (ratchet cranking) and do that a few more times, (ratchet cranking) or just two more times. (torque wrench cranking) And once you have that process done, (torque wrench beeping) we will back off the nut because we want that to be hand tight. And then we can install our locking collar. Just slip it over the nut, just like that. And we'll take our calipers, and I'd recommend just pushing back on your slide pins to get them out of the way. And then these pads sometimes will come unclip. So I like to just hold onto that inner pad to at least get it started. Slide that over our bracket. We can try to get our bolts to line up with the holes. Once you get that all lined up, we'll just tighten that down with a 13 millimeter wrench. (ratchet cranking) (ratchet cranking) We'll use our torque wrench to torque our caliper down to the specification in the instructions. (torque wrench cranking) (torque wrench beeping) Next, we'll figure out how we're gonna be mounting our actuator. So I like doing it in the front storage compartment here. We're quite filled up with all of our solar and our extra batteries. There was actually a slot right here that's almost perfect to fit our actuator in. So once you kind of map out where you're gonna be mounting it, you'll want to have, you'll want to drill a hole for our lines to go through. So what I do is just thread on your fitting. It's gonna be a 90 degree, so have that going straight down. And then I just mocked this up in here. Mark the hole, took it back out. And then I used a step bit to drill that hole out. And since we're gonna have a rubber hose going through this, I did find a grommet that'll fit perfectly in there so I can just slice a hole in that and send our line down through there. So now we have all that figured out, what I'll do is just feed our brake line up through that hole, and then we're gonna have to route the other end back towards our axles. And we can see where our line comes down through that hole, and we're routing it straight back, really just following our propane lines. I find that's the easiest way to make it look nice and neat. And we're just gonna follow those lines up until we get to the front axle. So our main brake line was a little bit long for our setup, so I ended up just looping it around to take away some of that slack. And then we're gonna tie into our first junction, the four-way junction. So that's where our main line goes in. And the first connection I made from there was to our left front caliper here. And as far as tension on this, right now with the way we have our camper lifted, we're at full droop on our suspension. So it can be a little tight at this point. Just make sure it's not, like, pulling on anything. But that's our limit. So driving down the road, we should be fine. So we got that connected to our caliper. Then we have one medium-sized hose going to the other side of the camper. And then another one going back to our second junction. So for our left rear caliper, what we'll have to do is just kind of zip-tie our junction up, but we are tying into our three-way junction for this connection, so that your shorter hose is gonna go straight to this caliper here and then the medium-sized hose is gonna go across. And the whole time I'm setting this up, I'm just mocking everything 'cause you will have to redo your connections every once in a while just to get everything at the right angle. And once you have all of your brake lines routed out, I like to tighten everything down before I get our junctions tied up, just 'cause they're usually in pretty tight spots. So I'll show you how I'm tightening these down. I'm using a 15 millimeter wrench to hold onto that junction, and then a 10 millimeter flare wrench to tighten our fitting down. And you do want to kind of crank these down. You don't wanna tighten it so much because these are brass and it's pretty fragile, but we just don't want any leaks whenever we're bleeding the system. So get these all tightened down and then I'll finish tying up my lines. Now we're ready to start wiring up our actuator. So since this is such a tight spot in here, I'm gonna wait on attaching our brake line and then bolting down our actuator till we have everything wired up. So what we'll do is we'll start by testing the wires just to figure out which ones we're gonna be working with. Now, a lot of times, on installs in the past, I've just gone through our junction box, which is closest to the kingpin, but that involves routing wires up through here. So just to minimize that, we will still have to run one wire up there, but just to minimize that, I'm gonna make all of our connections right here. To do our testing, we're using a test box, but you can do this at home, just hook up your truck to your seven-way and you'll have to do things slightly different. So we have the test box to test for 12-volt power, which I'll do first. And then when you're testing for your brake controller, you'll just have to have somebody manually turn on your brake controller and test it that way. But essentially, it's gonna do the same thing for us. So as I said, I'm starting with our 12-volt power, which 99% of the time is gonna be your thicker black wire here. It's always a good idea to test it anyways. So I'll use my test tight, get access to that. (tester beeping) I'll test it while my test box is on. I turn my test box off and I have no power anymore. So I'll test it here just to show you in case you are wiring it up at your junction box. I'm also gonna test inside of our storage area just to make sure I have the correct wire. (tester beeping) For our brake controller wire, we're gonna test. And if you don't have a test box, have a partner just manually turning your brakes on. And once again, 99% of the time it's gonna be your blue wire here. (tester beeping) So right now I have our brakes on and my test light lit up. And now I have it off and I'm getting those signals. So that's definitely our brake controller wire. And once again, since I'm wiring in here, I'm just gonna make sure I have that same wire and it's this blue one in my duplex. (tester beeping) (transition whooshing) So now we figured out where these two wires are going. Our blue is for our brake controller signal, the black is gonna tie into that 12-volt, and our white wire, that's our ground. And one thing with this is you wanna make sure that you're tying into your towed vehicle ground. It's gonna be coming through that seven-way. So just make sure that you have that ground wire. And then our yellow wire is that wire that I was talking about that we'll have to route up through here to connect to our actuator, out here to connect to our breakaway switch. So honestly, one of the hardest parts about wiring these actuators is fishing your wires up to your kingpin. So I have these wire fishers. They're really just flexible plastic that you can thread together. That's the best way I could figure out how to get it routed. But I have three of those threaded together, and I finally got it to come out the other end. What we'll do is take our extra wire and tape that to our fish wire. And there is a lot of tight spaces up there. It took me a handful of times to actually get this fish wire to go through. So I'm gonna make sure I tape this to the fish wire really good. That way we don't have it coming off. So I gotta tape to that end. And I'll go to the other end and pull it through. (metal clacking) Just have this mocked up just to give us more room. So we're gonna start with our 12-volt positive, which is labeled here. It's our black wire. I'm gonna make you making these connections using a WAGO connector. You can also use a butt connector, just whatever you have that we'll connect these wires. So already stripped back a little bit of that wire and plugged it in. And if you remember with our testing, we found out our black wire was our 12 volt. So I'm gonna cut into that and strip both ends. And get that tied into our connector. Strip it back. Open up our connector and get that pushed in. This is pretty thick wire, so you will need a thick connector to make it work. Get that pushed in, close it. And same thing with the other end of that wire. With our blue wire for our brake controller, when we cut into our factory brake controller wire, we wanna make sure that we're tying in the end that's coming from our kingpin. Just the same way we did the other ones, get that closed down. And then the other end of that wire that's going towards our axles, we're actually not gonna use that. So I just cut it and then tape the end, just so it doesn't make contact. Not that it has any power going through it. But we don't wanna hook this up because in the past, we've just had issues with brake controllers, thinking that they have two braking systems hooked up and not wanting to work correctly. And then the wire that we ran through, that's gonna be connected up to our wiring on our breakaway switch, which is gonna tie into the yellow wire on our actuator. For this connection, I'm gonna make the connection with a butt connector, just to kinda show you how to go about that. So we'll strip back the end of that wire that we ran up and insert that into our butt connector. I am using a heat shrink butt connector. It's really just what I had on hand. But sometimes moisture can get into these, so you may want to just use that to protect the wiring on your brakes. But we'll tie that in with our yellow wire there and crimp it down. Now that white wire coming off of our actuator is for our ground, so I'm using that ground that's coming off of our seven-way. And just using the WAGO connector once again to make that connection. And one reason why I like these WAGO connectors is whenever you're pushing them in, this back part is clear so you can see and make sure that your wire is actually going in and making that metal-to-metal contact that you want. Now the other end of our black wire here at our pin box, we need to route through our opening in the junction. So this one's pretty easy to operate. We'll just loosen up the two Phillips screws to give us room, and then get all these wires, or get this one wire into the loom that we have. Push that end down through. Once we get that pulled all the way through, I'll just snug those two Phillips screws back up. And the wires that we're gonna be connecting to are gonna be this orange wire coming off of our breakaway switch. So to kind of test this, I just was pulling on it earlier and saw that these two orange wires here. And since these only have a two-post connector, I'm just gonna swap it out into a three-post. I might actually clean up these wires a little bit, so I'll just strip that back again to get all of our strands in, connect those two into our new WAGO. I will take that black wire. Cut off a little bit. Still leave enough slack to work with. Strip that back and push that in to make our connection. (heat gun whirring) Now we can connect our brake line, which in this tight spot is pretty tricky on our setup, but we're just gonna use that same 10 millimeter flare nut wrench to get this snugged down. And then we can start filling our actuator with brake fluid and testing it all out. Before we do any kind of testing and hook up to power and all that, you will want to fill up your actuator with some DOT 4 brake fluid. Now we're gonna just test everything, make sure everything's functioning properly. And my setup looks kind of weird, but really, I just have a brake controller, so this is the same thing as if you we inchesre hooked up to your truck. But when I hit the manual brakes, I can hear my actuator kicking on, so that means that's working properly. And then also, when I pull the breakaway switch, I can, once again, hear that actuator kicking on, so that's working properly. You can start bleeding our brakes. So if you're by yourself, what I do is just pull your breakaway switch and let your actuator run. And then we'll go to the caliper furthest from our actuator and start bleeding it. So now we're at our caliper. I have a bottle hooked up just with a tube. You can just use a pan. We just wanna make sure we're catching that brake fluid. Then with an 11 millimeter wrench, I'm gonna open up our bleeder. And what we're looking for is just clear fluid coming out. Once you see that there's no more bubbles, just close that up. And then I'm gonna reinstall our breakaway switch and make sure that our actuator has fluid in it still. Now we'll move on to the next caliper. And you do want to do this in a particular order. So I'm going from the furthest away, which is the passenger rear. Next will be the next furthest away, which is the driver's rear, and just kind of working your way up to the driver's front. And every time I finish on a caliper, I'm gonna have to top off my brake fluid. So just keep an eye on that. You don't want this to run dry. Now I pulled the breakaway switch again and I'm gonna go through all of our connections to make sure I have no fluid leaking. If you do find that you're having a leak, tighten it up, and then you'll have to go through and do that bleeding process one more time. Also, while it's running, I'm just gonna go to each of our hubs and double-check, make sure where those brakes are actually holding our rotor tight. (transition whooshing) Now that we're done messing around with our wires and all that, we will just drive a couple self-tappers into the front bracket on our actuator and get that secured down. (drill whirring) (drill whirring) Now we can make sure that our hubs are fully greased. So just use your grease gun on your Zerk fitting. And you wanna push grease in that while rotating your rotor and you wanna see it kind of flower around there. As you can tell I've already done mine, but you just have to pump grease in it until you see that grease start to come out through the bearing. And then we'll take our cap and get that installed. For this, you can use a piece of wood, just like we installed the inner bearing seal. I actually have a seal driver that makes it a little bit easier to get that tapped in. (metal thudding) And you just wanna make sure that you are sitting flush around your edge. Then we can install our rubber seal. All that's left is to get our wheels back on and torque those down. Then we can hit the road. So that's gonna do it for our look at and installation of the DeeMaxx Electric over hydraulic disc brake kit on our 2025 Jayco Eagle.
Ratings & Reviews

Best upgrade to our 5th wheel. I will do this to every trailer I ever own. The install was straight forward if you have some mechanical knowledge and experience.
Just traveled 800 miles after installing the disc brakes. Stopping distance is half of what it was. So pleased!
Excellent customer service. All of my questions were answered. All of parts arrived the very next day. Parts appear to be of high quality.
We had a rough start getting the right brakes for our Brinkley Z3100. However after ETrailer realized they made an error on the order they were right on top of it, doing everything they could do to make it right. Their people are great, kind, well informed in their products, and communicate very promptly. E Trailer will be my go to supplier for RV, and Trailer needs.
You will not be disapointed with their customer care!
Easy installation, work so much better than stock drums. Some brake pad noise under lite braking.
Angie Z was so helpful and a pleasure to work with.
Will definitely use them again.
Great Service!! Fast delivery.
The first order I made was incorrect due to my mistake, but Amy took care of it had the correct items sent out with the wrong items returned. Everything was very smooth.
Really surprised how quickly parts came. One box looked pretty rough, but all parts appear to be there. Will know more after install and put a few miles on the trailer.
The boxes arrived fully sealed, but there was significant rust on the races of two of the four hubs. I sanded the races to remove it and hopefully it won’t have long term impact. Otherwise, quality looks good and can’t wait to get them installed.
One of the kits was missing all 5 mount bolts, had to run to Hardware store to get replacements. Bolt up is simple & strait forward. Packaging needs to be more substantial as the calpers were floating around in the box & had some scuffing damage.. maybe put some composite straps around boxing so they can be easier to Carry?
Etrailer to the rescue! Extremely high quality direct replacement for DeeMaxx EOH kit DE66AR offered on this site. Our original got damaged after a bearing failure. I actually cary a spare set of bearings which allowed us at a minimum to limp our RV home and avoid an expensive tow. Now I will replace the damaged parts.
I have towed my 16,000lb fifth wheel over 12,000mi since installing the disc brake system. The braking power and control is vastly improved with the disc brakes over the drum brakes. I am certain that I avoided a major accident because of the disc brake system. The kit had everything I needed and the customer service was great.
Have a 2024 Brinkley camper. Barley felt the drum brakes work. Camping in Colorado and the Black Hills was a little stressful with little brake help from the camper. Winter here. I've only took the camper on a test drive (20 miles) with the new disc brakes. They work awesome! All the brake power you need from the camper now.
I ordered the wrong brake kit at first. I needed 9/16" bolts instead of 1/2". Ashley from E-tailer got what I needed coming and gave ups the pickup label right after I called. Thank you Ashley!
As for the brake install. Fairly easy. Not fun, but easy. The hardest part was running and securing the brake lines. And maybe the wiring up the actuator. Instructions were great. Just a little intimidating the first time. Next time will take half the time to do. But I no plains for the next time! Also make sure your brake controller can change to elec. over hdy. Luckily my 2023 F350 did and was easy to change on the screen.
Thank you again Ashley!!
Not sure if parts are correct. Brake calipers don't mount t at 3 or 9. Called etrailer they were no help. They told me to call the manufacturer.....
These seem to be great brakes and well-made and my camper stops much better now. I had originally only given the product a one-star rating because of a customer service issue and a bracket problem. But I am changing it to a five-star review because the company president called me directly and worked out the problem. Not only do they have a great product but they are willing to make things right. Great company and great product, well worth the money. The best upgrade I have done to my fifth wheel so far. If you buy the kit for the 6000lb axle, and they send you the open bracket which cannot be installed as the instruction say at the 3 and 9 o’clock positions, call the company and they will send you the correct closed brackets.
Do you have a question about this Trailer Brake?
Info for this part was:
At etrailer we provide the best information available about the products we sell. We take the quality of our information seriously so that you can get the right part the first time. Let us know if anything is missing or if you have any questions.



















Thank you! Your comment has been submitted successfully. You should be able to view your question/comment here within a few days.
Error submitting comment. Please try again momentarily.